[fusion_builder_container hundred_percent=”no” equal_height_columns=”no” menu_anchor=”” hide_on_mobile=”small-visibility,medium-visibility,large-visibility” class=”” id=”” background_color=”” background_image=”” background_position=”center center” background_repeat=”no-repeat” fade=”no” background_parallax=”none” parallax_speed=”0.3″ video_mp4=”” video_webm=”” video_ogv=”” video_url=”” video_aspect_ratio=”16:9″ video_loop=”yes” video_mute=”yes” overlay_color=”” video_preview_image=”” border_size=”” border_color=”” border_style=”solid” padding_top=”” padding_bottom=”” padding_left=”” padding_right=””][fusion_builder_row][fusion_builder_column type=”1_1″ layout=”1_1″ background_position=”left top” background_color=”” border_size=”” border_color=”” border_style=”solid” border_position=”all” spacing=”yes” background_image=”” background_repeat=”no-repeat” padding_top=”” padding_right=”” padding_bottom=”” padding_left=”” margin_top=”0px” margin_bottom=”0px” class=”” id=”” animation_type=”” animation_speed=”0.3″ animation_direction=”left” hide_on_mobile=”small-visibility,medium-visibility,large-visibility” center_content=”no” last=”no” min_height=”” hover_type=”none” link=””][fusion_text columns=”” column_min_width=”” column_spacing=”” rule_style=”default” rule_size=”” rule_color=”” hide_on_mobile=”small-visibility,medium-visibility,large-visibility” class=”” id=””]
Introduction
In this chapter, you are introduced to Linux kernel programming on an embedded device such as a Beagle board. Kernel programming is an advanced topic that requires in-depth study of the source code for the Linux kernel; however, this chapter is structured as a practical step-by-step guide to the focused task of writing Linux loadable kernel modules (LKMs) that interface to general-purpose inputs/outputs (GPIOs). The first example is a straightforward “Hello World” module that can be used to establish a configuration for LKM development on the board. The second LKM example introduces interrupt service routines (ISRs), and interfaces a simple GPIO button and LED circuit to Linux kernel space. Two further examples are provided that introduce the kobject interface and the use of kernel threads to build kernel-space sysfs devices for the board. By the end of this chapter, you should be familiar with the steps required to write kernel code, and appreciate the programming constraints that such development entails.
After completing this chapter, you should be able to do the following:
- Write a basic Linux loadable kernel module (LKM) that can receive a kernel argument.
- Build, load, and unload a custom LKM on a Beagle board.
- Undertake the steps required to build a module for embedded devices that can control GPIOs.
- Appreciate some of the concepts required to build LKMs on an embedded Linux device, such as interrupts, kobjects, and kernel threads.
[/fusion_text][/fusion_builder_column][/fusion_builder_row][/fusion_builder_container][fusion_builder_container hundred_percent=”yes” overflow=”visible”][fusion_builder_row][fusion_builder_column type=”1_1″ layout=”1_1″ background_position=”left top” background_color=”” border_size=”” border_color=”” border_style=”solid” spacing=”yes” background_image=”” background_repeat=”no-repeat” padding_top=”” padding_right=”” padding_bottom=”” padding_left=”” margin_top=”0px” margin_bottom=”0px” class=”” id=”” animation_type=”” animation_speed=”0.3″ animation_direction=”left” hide_on_mobile=”no” center_content=”no” min_height=”none” last=”no” hover_type=”none” link=”” border_position=”all”][fusion_imageframe lightbox=”no” style_type=”bottomshadow” bordercolor=”” bordersize=”0px” borderradius=”0″ stylecolor=”” align=”left” link=”http://derekmolloy.ie/writing-a-linux-kernel-module-part-1-introduction/” linktarget=”_blank” animation_type=”0″ animation_direction=”down” animation_speed=”0.1″ class=”” id=””]  [/fusion_imageframe][fusion_text]
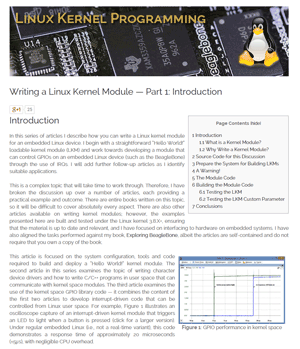
In the series of three articles that are linked here, I describe how you can write a Linux loadable kernel module (LKM) for an embedded Linux device. I begin with a straightforward “Hello World!” loadable kernel module (LKM) and work towards developing a module that can control GPIOs on the BeagleBone through the use of IRQs. This is a complex topic, which I have broken up over a number of articles, each providing a practical example and outcome. There are entire books written on this topic, so it is difficult to cover absolutely every aspect. I have aligned the tasks performed against the configurations that are provided within the book.
The first article, “Writing a Linux Kernel Module — Part 1: Introduction,” was released on the 15th April 2015. It is focused on the system configuration, tools and code required to build and deploy a “Hello World!” kernel module. Please click on the image page on the left to view the full article at my blog site.
[/fusion_text][fusion_separator style_type=”” top_margin=”10″ bottom_margin=”10″ sep_color=”” icon=”” width=”” class=”” id=”” /][/fusion_builder_column][fusion_builder_column type=”1_1″ layout=”1_1″ background_position=”left top” background_color=”” border_size=”” border_color=”” border_style=”solid” spacing=”yes” background_image=”” background_repeat=”no-repeat” padding_top=”” padding_right=”” padding_bottom=”” padding_left=”” margin_top=”0px” margin_bottom=”0px” class=”” id=”” animation_type=”” animation_speed=”0.3″ animation_direction=”left” hide_on_mobile=”no” center_content=”no” min_height=”none” last=”no” hover_type=”none” link=”” border_position=”all”][fusion_tagline_box backgroundcolor=”” shadow=”yes” shadowopacity=”0.7″ border=”0px” bordercolor=”” highlightposition=”top” content_alignment=”left” link=”https://github.com/derekmolloy/exploringBB/tree/master/extras/kernel/” linktarget=”_blank” modal=”” button_size=”” button_shape=”” button_type=”” buttoncolor=”” button=”Get Source Code” title=”Source Code for this Series of Articles” description=”” animation_type=”0″ animation_direction=”down” animation_speed=”0.1″ class=”” id=””]
All of the code for this discussion is available in the GitHub repository for the book Exploring BeagleBone. The code can be viewed publicly at: the ExploringBB GitHub Kernel Project directory, and/or you can clone the repository on your BeagleBone (or other Linux device) by typing:
molloyd@beaglebone:~$ sudo apt-get install git
molloyd@beaglebone:~$ git clone https://github.com/derekmolloy/exploringBB.git
The /extras/kernel/ directory and its sub-directories provide the source code for this series of articles. The auto-generated Doxygen documentation for these code examples is available in HTML format and PDF format.
[/fusion_tagline_box][fusion_imageframe lightbox=”no” style_type=”bottomshadow” bordercolor=”” bordersize=”0px” borderradius=”0″ stylecolor=”” align=”right” link=”http://derekmolloy.ie/writing-a-linux-kernel-module-part-2-a-character-device/” linktarget=”_blank” animation_type=”0″ animation_direction=”down” animation_speed=”0.1″ class=”” id=””] [/fusion_imageframe][fusion_text]
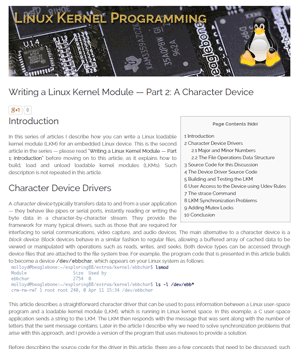
The second article, “Writing a Linux Kernel Module — Part 2: A Character Device,” was released on the 18th April 2015. This article describes a straightforward character driver that can be used to pass information between a Linux user-space program and a loadable kernel module (LKM), which is running in Linux kernel space. In this example, a C user-space application sends a string to the LKM. The LKM then responds with the message that was sent along with the number of letters that the sent message contains. Later in the article I describe why we need to solve synchronization problems that arise with this approach, and I provide a version of the program that uses mutexes to provide a solution.
The third article “Writing a Linux Kernel Module — Part 3: Buttons and LEDs” is focused on education and training rather than a deep practical need — I believe that if you can read a button press and flash an LED then you are well on your way to interfacing to most digital devices. Therefore, there are three different LKMs described in this article, each with its own individual purpose and needs:
[/fusion_text][fusion_imageframe lightbox=”no” style_type=”bottomshadow” bordercolor=”” bordersize=”0px” borderradius=”0″ stylecolor=”” align=”left” link=”http://derekmolloy.ie/kernel-gpio-programming-buttons-and-leds/” linktarget=”_self” animation_type=”0″ animation_direction=”down” animation_speed=”0.1″ class=”” id=””] [/fusion_imageframe][fusion_text]
- Example 1: Button Press, LED Light: In this example an LED lights when a button is pressed — simple! (no not really). To perform this task, the concept of kernel interrupts is introduced and the use of the library of code that can be accessed using linux/gpio.h. This example is used to test the interrupt performance.
- Example 2: Enhanced Button GPIO Driver: This example is used to introduce kobjects and a mechanism for adding your own entries to Sysfs. This allows you to send data to and receive data from the LKM at run time. The example also introduces the use of timing in kernel code.
- Example 3: Enhanced LED GPIO Driver: This example is used to flash an LED, which allows for a discussion on Linux kthreads. Essentially, an LED is flashed at a frequency using a kernel module, which can be controlled from Linux user space.
Video Demonstration
A short YouTube video is provided here that presents an overview of the functionality of the LKMs that are developed in this article.
[/fusion_text][/fusion_builder_column][fusion_builder_column type=”1_1″ layout=”1_1″ background_position=”left top” background_color=”” border_size=”” border_color=”” border_style=”solid” spacing=”yes” background_image=”” background_repeat=”no-repeat” padding_top=”” padding_right=”” padding_bottom=”” padding_left=”” margin_top=”0px” margin_bottom=”0px” class=”” id=”” animation_type=”” animation_speed=”0.3″ animation_direction=”left” hide_on_mobile=”no” center_content=”no” min_height=”none” last=”no” hover_type=”none” link=”” border_position=”all”][fusion_youtube id=”ltCZydX_zmk” width=”700″ height=”409″ autoplay=”no” api_params=”” class=”” /][fusion_text]
Video 1: A video of the functionality of the LKMs that are described in this article.
[/fusion_text][fusion_separator style_type=”shadow” top_margin=”40″ bottom_margin=”40″ sep_color=”” icon=”” width=”” class=”” id=”” /][fusion_text]
Recommended Books on the Content in this Chapter
The following books contain further information on Linux kernel development. It is difficult to get up-to-date books on Linux development, but most of the principles described in these books hold true today:
[/fusion_text][/fusion_builder_column][fusion_builder_column type=”1_1″ layout=”1_1″ background_position=”left top” background_color=”” border_size=”” border_color=”” border_style=”solid” spacing=”yes” background_image=”” background_repeat=”no-repeat” padding_top=”” padding_right=”” padding_bottom=”” padding_left=”” margin_top=”0px” margin_bottom=”0px” class=”” id=”” animation_type=”” animation_speed=”0.3″ animation_direction=”left” hide_on_mobile=”no” center_content=”no” min_height=”none” last=”no” hover_type=”none” link=”” border_position=”all”][fusion_text][amazon asin=0672329468&template=Iframe Image] [amazon asin=0596005652&template=Iframe Image] [amazon asin=1593272200&template=Iframe Image] [amazon asin=1449371612&template=Iframe Image] [amazon asin=1449339530&template=Iframe Image] [amazon asin=0321637739&template=Iframe Image][/fusion_text][/fusion_builder_column][/fusion_builder_row][/fusion_builder_container]


Hi Derek,
Thanks a lot. I am referring your book for Beagle bone development, its amazing. This book solves hundreds of my questions.
Thanks once again.
I would like to run and Dubug the program (/ExploringBB/extras/kernel/gpio_test), the same that you have explained in part3: Buttons and LEDs.
Actually my target is : I want to put breakpoint in interrupt handler of button press. So when i press the button the program should stop on that breakpoint.
Please guide for how to proceed.
Thanks.
Hi Rakesh, I don’t know how you could do that. Sorry, Derek.
Actually, I would like to run (/ExploringBB/extras/kernel/gpio_test) program in Elclipse IDE with run time debugger.
one solution i did that, with the use of BBBchroot i solved some of the errors like
#include
#include
#include
#include
#include
but still some errors i need to resolve
/BBBchroot/usr/src/linux-headers-3.8.13-bone50/include/linux/init.h:255:13: error: expected ‘=’, ‘,’, ‘;’, ‘asm’ or ‘__attribute__’ before ‘parse_early_param’
/BBBchroot/usr/src/linux-headers-3.8.13-bone50/include/linux/init.h:256:13: error: expected ‘=’, ‘,’, ‘;’, ‘asm’ or ‘__attribute__’ before ‘parse_early_options’
/BBBchroot/usr/src/linux-headers-3.8.13-bone50/include/linux/linkage.h:5:25: fatal error: asm/linkage.h: No such file or directory
for the above program to run, i am using Eclipse IDE.
Rakesh.
Hi,
how can i do debugging in kernel for ADC using eclipse luna.
I don’t think that is possible.
Hello Derek, I have a problem with my beaglebone I installed via ssh an rt kernel using rsync and after the reboot my beaglebone refuses ssh connection how can I fix this?
Hi there, on solution is that you can use the USB UART TTL 3V3 cable that is described in Chapter 1 to connect to the BBB and ensure that the sshd is running. Alternatively, you could attach a monitor, keyboard, mouse and do the same. Kind regards, Derek.
thank you Derek Ill have to buy it because I disabled the HDMI for pwm outputs and…
Do I need the HDMI for flashing? or can I just reinstall debian and work with it?
Hi David, No HDMI is not required for flashing — see the guide in Chapter 2. Kind regards, Derek.
Hi Derek,
I’ve been trying to get an LED kernel driver running on my BBB but i’m always getting an error when trying to access the pins :
[ 195.251541] gpio_request: gpio-53 (sysfs) status -16
[ 195.251569] gpio_request: gpio-54 (sysfs) status -16
[ 195.251593] gpio_request: gpio-55 (sysfs) status -16
[ 195.251617] gpio_request: gpio-56 (sysfs) status -16
I think -16 stands for EBUSY which is not weird because the default LED kernel driver is actually using the pins (default heartbeat when we boot the board etc…). My driver actually works and make the LEDs blink but I don’t think this is a clean way to do it.
What i’d like to know is this : how can I disable the default LED kernel driver so that I don’t get this error and the pins are unsused when I request them ? I think I might have to rebuild a custom kernel or mess with the device tree but I just don’t know where to start. Can you help ?
PS : my code is on GitHub : https://github.com/Fointard/SLD
Hi Fointard, my guess is that the device tree overlay notes exclusive use of these pins with GPIO-LEDs and therefore when you use them in your module the requests appear. You would probably have to disable the GPIO-LEDs entry in the DTS for the BBB and then it would be fine (see Chapter 6 and Chapter 3). Kind regards, Derek.
Excellent addition, very great read. Might have to use soon as well: has anyone else noticed that P9_15 AKA GPIO_48 has stopped responding after updating to the latest 8.3 kernel? I’ve been using that pin as a toggle for months but this kernel broke the function for reasons I cannot discern. An LKM may fix it.