[fusion_builder_container backgroundcolor=”no” backgroundimage=”” backgroundrepeat=”no-repeat” backgroundposition=”left top” backgroundattachment=”scroll” video_webm=”” video_mp4=”” video_ogv=”” video_preview_image=”” overlay_color=”” video_mute=”yes” video_loop=”yes” fade=”no” bordersize=”0px” bordercolor=”” borderstyle=”” paddingtop=”0px” paddingbottom=”0px” paddingleft=”0px” paddingright=”0px” menu_anchor=”” equal_height_columns=”no” hundred_percent=”no” class=”” id=””][fusion_builder_row][fusion_builder_column type=”1_1″ layout=”1_1″ background_position=”left top” background_color=”” border_size=”” border_color=”” border_style=”solid” spacing=”yes” background_image=”” background_repeat=”no-repeat” padding_top=”” padding_right=”” padding_bottom=”” padding_left=”” margin_top=”0px” margin_bottom=”0px” class=”” id=”” animation_type=”” animation_speed=”0.3″ animation_direction=”left” hide_on_mobile=”no” center_content=”no” min_height=”none” last=”no” hover_type=”none” link=”” border_position=”all”][fusion_title size=”1″ content_align=”left” style_type=”single solid” sep_color=”” class=”” id=””]Introduction[/fusion_title][fusion_text columns=”” column_min_width=”” column_spacing=”” rule_style=”default” rule_size=”” rule_color=”” hide_on_mobile=”small-visibility,medium-visibility,large-visibility” class=”” id=””]
This is the chapter web page to support the content in Chapter 14 of the book: Exploring BeagleBone – Tools and Techniques for Building with Embedded Linux. The summary introduction to the chapter is as follows:
In this chapter, USB peripherals are attached to the BeagleBoard so that it can be used for capturing image, video, and audio data using low-level Linux drivers and APIs. It describes Linux applications and tools that can be used to stream captured video and audio data to the Internet. Open Source Computer Vision (OpenCV) image processing and computer vision approaches are investigated that enable the Beagle board to draw inferences from the information content of the captured image data. Capture and playback of audio streams is described, along with the use of Bluetooth audio. The chapter also covers some applications of audio on the Beagle board, including streaming audio, Internet radio, and text-to-speech.
[/fusion_text][/fusion_builder_column][/fusion_builder_row][/fusion_builder_container][fusion_builder_container hundred_percent=”yes” overflow=”visible”][fusion_builder_row][fusion_builder_column type=”3_5″ layout=”3_5″ last=”no” spacing=”yes” background_color=”” background_image=”” background_repeat=”no-repeat” background_position=”left top” border_size=”0px” border_color=”” border_style=”” padding_top=”” padding_right=”” padding_bottom=”” padding_left=”” class=”” id=”” min_height=”” hover_type=”none” link=”” border_position=”all”][fusion_text columns=”” column_min_width=”” column_spacing=”” rule_style=”default” rule_size=”” rule_color=”” hide_on_mobile=”small-visibility,medium-visibility,large-visibility” class=”” id=””]
Learning Outcomes
After completing this chapter, you should be able to:
- Capture image and video data on the Beagle board using USB webcams combined with Linux Video4Linux2 drivers and APIs.
- Use Video4Linux2 utilities to get information from and adjust the properties of video capture devices.
- Stream video data to the Internet using Linux applications and UDP, multicast, and RTP streams.
- Use OpenCV to perform basic image processing on an embedded Linux device.
- Use OpenCV to perform a computer vision face-detection task.
- Utilize the Boost C++ libraries on the Beagle board.
- Play audio data using HDMI audio and USB audio adapters. The audio data can be raw waveform data or compressed MP3 data from the board file system or from Internet radio streams.
- Record audio data using USB audio adapters or webcams.
- Stream audio data to the internet using UDP.
- Play audio to Bluetooth A2DP audio devices, such as Hi-Fi systems.
- Use text-to-speech (TTS) approaches to verbalize the text output of commands that are executed on the Beagle board.
[/fusion_text][/fusion_builder_column][fusion_builder_column type=”2_5″ layout=”2_5″ last=”yes” spacing=”yes” background_color=”” background_image=”” background_repeat=”no-repeat” background_position=”left top” border_size=”0px” border_color=”” border_style=”” padding_top=”” padding_right=”” padding_bottom=”” padding_left=”” class=”” id=”” min_height=”” hover_type=”none” link=”” border_position=”all”][fusion_text][toc][/fusion_text][fusion_sharing tagline=”Share this page:” tagline_color=”” title=”Exploring BeagleBone: Chapter 1″ link=”http://exploringbeaglebone.com/chapter1/” description=”” pinterest_image=”” icons_boxed=”” icons_boxed_radius=”4px” box_colors=”” icon_colors=”” tooltip_placement=”” backgroundcolor=”” class=”” id=”” /][/fusion_builder_column][/fusion_builder_row][/fusion_builder_container][fusion_builder_container backgroundcolor=”no” backgroundimage=”” backgroundrepeat=”no-repeat” backgroundposition=”left top” backgroundattachment=”scroll” video_webm=”” video_mp4=”” video_ogv=”” video_preview_image=”” overlay_color=”” video_mute=”yes” video_loop=”yes” fade=”no” bordersize=”0px” bordercolor=”” borderstyle=”” paddingtop=”0px” paddingbottom=”0px” paddingleft=”0px” paddingright=”0px” menu_anchor=”” equal_height_columns=”no” hundred_percent=”no” class=”” id=””][fusion_builder_row][fusion_builder_column type=”1_1″ layout=”1_1″ background_position=”left top” background_color=”” border_size=”” border_color=”” border_style=”solid” spacing=”yes” background_image=”” background_repeat=”no-repeat” padding_top=”” padding_right=”” padding_bottom=”” padding_left=”” margin_top=”0px” margin_bottom=”0px” class=”” id=”” animation_type=”” animation_speed=”0.3″ animation_direction=”left” hide_on_mobile=”no” center_content=”no” min_height=”none” last=”no” hover_type=”none” link=”” border_position=”all”][fusion_title size=”1″ content_align=”left” style_type=”single solid” sep_color=”” class=”” id=””]Products Used in this Chapter[/fusion_title][/fusion_builder_column][/fusion_builder_row][/fusion_builder_container][fusion_builder_container hundred_percent=”yes” overflow=”visible”][fusion_builder_row][fusion_builder_column type=”3_5″ layout=”3_5″ last=”no” spacing=”yes” background_color=”” background_image=”” background_repeat=”no-repeat” background_position=”left top” border_size=”0px” border_color=”” border_style=”” padding_top=”” padding_right=”” padding_bottom=”” padding_left=”” class=”” id=”” min_height=”” hover_type=”none” link=”” border_position=”all”][fusion_text]
Here are links to some of the products that are used in this chapter. Please do your own due diligence on these products and the retailers that are identified:
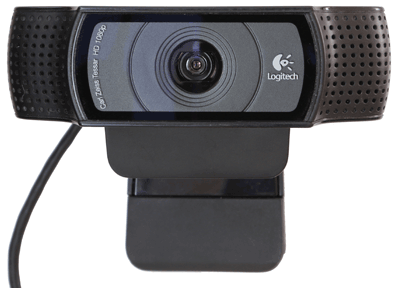 The Logitech C920 is the preferred USB camera for this chapter, particularly if you wish to perform video streaming applications. It is an expensive camera, primarily because of the fact that it contains a H.264 hardware encoder, which takes the workload away from the BeagleBone’s processor.
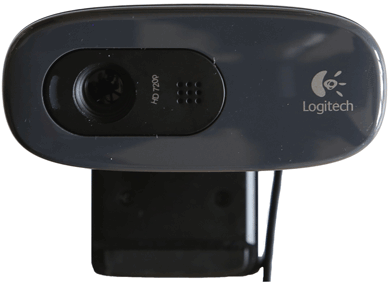
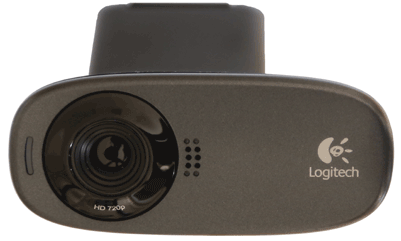
Two other lower-cost cameras are also tested in the chapter, the Logitech C270 and the Logitech C310. Both of the lower-cost cameras work well for image capture, computer vision, and audio capture applications.
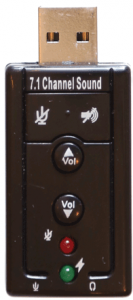
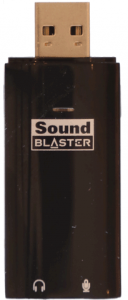
Two USB audio adapters are also tested in this chapter — the low-cost Dynamode USB audio adapter and a Creative USB Sound Blaster audio adapter.
The same Bluetooth adapter that is introduced in Chapter 9 is used again in this chapter for Bluetooth audio — the Kinivo BTD-400 Bluetooth 4.0 adapter.
[/fusion_text][/fusion_builder_column][fusion_builder_column type=”2_5″ layout=”2_5″ last=”yes” spacing=”yes” background_color=”” background_image=”” background_repeat=”no-repeat” background_position=”left top” border_size=”0px” border_color=”” border_style=”” padding_top=”” padding_right=”” padding_bottom=”” padding_left=”” class=”” id=”” min_height=”” hover_type=”none” link=”” border_position=”all”][fusion_text][amazon asin=B006JH8T3S,B004FHO5Y6,B003LVZO8S,B00K601VUW,B0044DEDC0,B007Q45EF4&template=ebbchapters][/fusion_text][/fusion_builder_column][/fusion_builder_row][/fusion_builder_container][fusion_builder_container backgroundcolor=”no” backgroundimage=”” backgroundrepeat=”no-repeat” backgroundposition=”left top” backgroundattachment=”scroll” video_webm=”” video_mp4=”” video_ogv=”” video_preview_image=”” overlay_color=”” video_mute=”yes” video_loop=”yes” fade=”no” bordersize=”0px” bordercolor=”” borderstyle=”” paddingtop=”0px” paddingbottom=”0px” paddingleft=”0px” paddingright=”0px” menu_anchor=”” equal_height_columns=”no” hundred_percent=”no” class=”” id=””][fusion_builder_row][fusion_builder_column type=”1_1″ layout=”1_1″ background_position=”left top” background_color=”” border_size=”” border_color=”” border_style=”solid” spacing=”yes” background_image=”” background_repeat=”no-repeat” padding_top=”” padding_right=”” padding_bottom=”” padding_left=”” margin_top=”0px” margin_bottom=”0px” class=”” id=”” animation_type=”” animation_speed=”0.3″ animation_direction=”left” hide_on_mobile=”no” center_content=”no” min_height=”none” last=”no” hover_type=”none” link=”” border_position=”all”][fusion_title size=”1″ content_align=”left” style_type=”single solid” sep_color=”” class=”” id=””]Digital Resources[/fusion_title][/fusion_builder_column][fusion_builder_column type=”3_5″ layout=”3_5″ last=”no” spacing=”yes” background_color=”” background_image=”” background_repeat=”no-repeat” background_position=”left top” border_size=”0px” border_color=”” border_style=”” padding_top=”” padding_right=”” padding_bottom=”” padding_left=”” class=”” id=”” min_height=”” hover_type=”none” link=”” border_position=”all”][fusion_youtube id=”8QouvYMfmQo” width=”600″ height=”350″ autoplay=”no” api_params=”” class=”” /][/fusion_builder_column][fusion_builder_column type=”2_5″ layout=”2_5″ last=”yes” spacing=”yes” background_color=”” background_image=”” background_repeat=”no-repeat” background_position=”left top” border_size=”0px” border_color=”” border_style=”” padding_top=”” padding_right=”” padding_bottom=”” padding_left=”” class=”” id=”” min_height=”” hover_type=”none” link=”” border_position=”all”][fusion_text]
Video: Video Capture and Image Processing
In this video I look at how you can get started with video capture and image processing on the Beaglebone. It is an introductory video that should give people who are new to this topic a starting point to work from. I look at three different distinct challenges: how do you capture video from a USB webcam under Linux, how do you capture image frames from a USB webcam under Linux, how do you use OpenCV to capture and image process frames so that you can build computer vision applications under Linux on the Beaglebone.
[/fusion_text][/fusion_builder_column][fusion_builder_column type=”2_5″ layout=”2_5″ last=”no” spacing=”yes” background_color=”” background_image=”” background_repeat=”no-repeat” background_position=”left top” border_size=”0px” border_color=”” border_style=”” padding_top=”” padding_right=”” padding_bottom=”” padding_left=”” class=”” id=”” min_height=”” hover_type=”none” link=”” border_position=”all”][fusion_text]
Video: Streaming Video & Custom Video Player
In this video I look at video streaming using the Beaglebone black using: RTP, UDP unicasting, and UDP multicasting, which allows one to many streaming. In all of these examples I used the VLC media player to display the video data. The final part of this video goes on to describe how you can build your own software implementation that can display the data using LibVLC and the Qt framework. The advantage of doing this is that you can add your own data processing and controlling functionality into the video display. You could even develop code for capturing multiple streams simultaneously and processing the data — for example, for stereo imaging.
[/fusion_text][/fusion_builder_column][fusion_builder_column type=”3_5″ layout=”3_5″ last=”yes” spacing=”yes” background_color=”” background_image=”” background_repeat=”no-repeat” background_position=”left top” border_size=”0px” border_color=”” border_style=”” padding_top=”” padding_right=”” padding_bottom=”” padding_left=”” class=”” id=”” min_height=”” hover_type=”none” link=”” border_position=”all”][fusion_youtube id=”-6DBR8PSejw” width=”600″ height=”350″ autoplay=”no” api_params=”” class=”” /][/fusion_builder_column][/fusion_builder_row][/fusion_builder_container][fusion_builder_container hundred_percent=”yes” overflow=”visible”][fusion_builder_row][fusion_builder_column type=”1_2″ layout=”1_2″ last=”no” spacing=”yes” background_color=”” background_image=”” background_repeat=”no-repeat” background_position=”left top” border_size=”0px” border_color=”” border_style=”” padding_top=”” padding_right=”” padding_bottom=”” padding_left=”” class=”” id=”” min_height=”” hover_type=”none” link=”” border_position=”all”][fusion_title size=”2″ content_align=”left” style_type=”single solid” sep_color=”” class=”” id=””]Important Documents[/fusion_title][/fusion_builder_column][fusion_builder_column type=”1_2″ layout=”1_2″ last=”yes” spacing=”yes” background_color=”” background_image=”” background_repeat=”no-repeat” background_position=”left top” border_size=”0px” border_color=”” border_style=”” padding_top=”” padding_right=”” padding_bottom=”” padding_left=”” class=”” id=”” min_height=”” hover_type=”none” link=”” border_position=”all”][fusion_title size=”2″ content_align=”left” style_type=”single solid” sep_color=”” class=”” id=””]External Web Sites[/fusion_title][/fusion_builder_column][fusion_builder_column type=”1_4″ layout=”1_4″ last=”no” spacing=”yes” background_color=”” background_image=”” background_repeat=”no-repeat” background_position=”left top” border_size=”0px” border_color=”” border_style=”” padding_top=”” padding_right=”” padding_bottom=”” padding_left=”” class=”” id=”” min_height=”” hover_type=”none” link=”” border_position=”all”][fusion_imageframe lightbox=”no” style_type=”dropshadow” bordercolor=”” bordersize=”0px” borderradius=”0″ stylecolor=”” align=”center” link=”http://www.ti.com/product/am3358″ linktarget=”_blank” animation_type=”0″ animation_direction=”down” animation_speed=”0.1″ class=”” id=””] ![]() [/fusion_imageframe][fusion_text]
[/fusion_imageframe][fusion_text]
The AM335x Technical Reference Manual (TRM)
[/fusion_text][/fusion_builder_column][fusion_builder_column type=”1_4″ layout=”1_4″ last=”no” spacing=”yes” background_color=”” background_image=”” background_repeat=”no-repeat” background_position=”left top” border_size=”0px” border_color=”” border_style=”” padding_top=”” padding_right=”” padding_bottom=”” padding_left=”” class=”” id=”” min_height=”” hover_type=”none” link=”” border_position=”all”][fusion_imageframe lightbox=”no” style_type=”dropshadow” bordercolor=”” bordersize=”0px” borderradius=”0″ stylecolor=”” align=”center” link=”https://github.com/CircuitCo/BeagleBone-Black/blob/master/BBB_SRM.pdf?raw=true” linktarget=”_blank” animation_type=”0″ animation_direction=”down” animation_speed=”0.1″ class=”” id=””] ![]() [/fusion_imageframe][fusion_text]
[/fusion_imageframe][fusion_text]
The BeagleBone Black System Reference Manual (SRM)
[/fusion_text][/fusion_builder_column][fusion_builder_column type=”1_2″ layout=”1_2″ last=”yes” spacing=”yes” background_color=”” background_image=”” background_repeat=”no-repeat” background_position=”left top” border_size=”0px” border_color=”” border_style=”” padding_top=”” padding_right=”” padding_bottom=”” padding_left=”” class=”” id=”” min_height=”” hover_type=”none” link=”” border_position=”all”][fusion_separator style_type=”shadow” top_margin=”” bottom_margin=”” sep_color=”” icon=”” width=”” class=”” id=”” /][fusion_text]
- Video4Linux2 core documentation: tiny.cc/ebb1203
- V4L2 API Specifi cation: tiny.cc/ebb1204
- Computer Vision Cascaded Classification: tiny.cc/ebb1207
- CVonline: The Evolving, Distributed, Non‐Proprietary, On‐Line Compendium of Computer Vision, at tiny.cc/ebb1211
- The Boost C++ Libraries, Boris Schäling: tiny.cc/ebb1214
[/fusion_text][/fusion_builder_column][/fusion_builder_row][/fusion_builder_container][fusion_builder_container backgroundcolor=”no” backgroundimage=”” backgroundrepeat=”no-repeat” backgroundposition=”left top” backgroundattachment=”scroll” video_webm=”” video_mp4=”” video_ogv=”” video_preview_image=”” overlay_color=”” video_mute=”yes” video_loop=”yes” fade=”no” bordersize=”0px” bordercolor=”” borderstyle=”” paddingtop=”0px” paddingbottom=”0px” paddingleft=”0px” paddingright=”0px” menu_anchor=”” equal_height_columns=”no” hundred_percent=”no” class=”” id=””][fusion_builder_row][fusion_builder_column type=”1_1″ layout=”1_1″ background_position=”left top” background_color=”” border_size=”” border_color=”” border_style=”solid” spacing=”yes” background_image=”” background_repeat=”no-repeat” padding_top=”” padding_right=”” padding_bottom=”” padding_left=”” margin_top=”0px” margin_bottom=”0px” class=”” id=”” animation_type=”” animation_speed=”0.3″ animation_direction=”left” hide_on_mobile=”no” center_content=”no” min_height=”none” last=”no” hover_type=”none” link=”” border_position=”all”][fusion_title size=”2″ content_align=”left” style_type=”single solid” sep_color=”” class=”” id=””]Errata[/fusion_title][fusion_text]None for the moment.
[/fusion_text][/fusion_builder_column][fusion_builder_column type=”1_1″ layout=”1_1″ background_position=”left top” background_color=”” border_size=”” border_color=”” border_style=”solid” spacing=”yes” background_image=”” background_repeat=”no-repeat” padding_top=”” padding_right=”” padding_bottom=”” padding_left=”” margin_top=”0px” margin_bottom=”0px” class=”” id=”” animation_type=”” animation_speed=”0.3″ animation_direction=”left” hide_on_mobile=”no” center_content=”no” min_height=”none” last=”no” hover_type=”none” link=”” border_position=”all”][fusion_title size=”2″ content_align=”left” style_type=”single solid” sep_color=”” class=”” id=””]Recommended Books on the Content in this Chapter[/fusion_title][fusion_text][amazon asin=0596516134&template=Iframe Image] [amazon asin=1449316549&template=Iframe Image] [amazon asin=0262014467&template=Iframe Image] [amazon asin=1937434362&template=Iframe Image] [amazon asin=1491903996&template=Iframe Image] [amazon asin=0071379290&template=Iframe Image][/fusion_text][/fusion_builder_column][fusion_builder_column type=”1_1″ layout=”1_1″ background_position=”left top” background_color=”” border_size=”” border_color=”” border_style=”solid” spacing=”yes” background_image=”” background_repeat=”no-repeat” padding_top=”” padding_right=”” padding_bottom=”” padding_left=”” margin_top=”0px” margin_bottom=”0px” class=”” id=”” animation_type=”” animation_speed=”0.3″ animation_direction=”left” hide_on_mobile=”no” center_content=”no” min_height=”none” last=”no” hover_type=”none” link=”” border_position=”all”][fusion_sharing tagline=”Share This Story, Choose Your Platform!” tagline_color=”” title=”” link=”” description=”” pinterest_image=”” icons_boxed=”” icons_boxed_radius=”4px” box_colors=”” icon_colors=”” tooltip_placement=”” backgroundcolor=”” class=”” id=”” /][/fusion_builder_column][/fusion_builder_row][/fusion_builder_container]

Loc 12881: Running the fswebcam utility doesn’t work as user Derek, as it apparently needs root access to the device. No sweat, but then the resulting image file is owned by root. Interestingly, if you chown it once and then re-run fswebcam again (using the same target filename), it retains user privileges. However I can see that a udev rule might be in order. Googling around a bit I’ve seen a couple different examples of such a rule for Logitech cameras. Not wanting to try several different ones though, I just thought I’d ask you if you’ve seen one that works reliably? It’s not a huge deal as a person can simply chown the file(s) as needed–but it might be easier to write a rule and be done with it. Thoughts?
Well, I got fed up with having to execute each and every command as root–so I spent two hours and FINALLY figured out how to get a udev rule working for the Logitech C910 camera I have. It was not easy. I used this link as a guide to finally get it working:
************************************************
http://www.linuxquestions.org/questions/linux-general-1/udev-webcam-rule-read-but-not-working-4175427378/
************************************************
Specifically, that first example there right towards the top of the page, under the “Fix webcam 1″ section. Anyone that wants to use the file I found, just verify the idVenfor and idProduct hex values, and set yours accordingly. Here’s the line I got to work:
~~~~~~~~~~~~~~~~~~~~~~~~~~~~~~~~
# Rule for making Logitech Pro HD C910 accessible to user
KERNEL==”video0″, SUBSYSTEM==”video4linux”, SUBSYSTEMS==”usb”, ATTRS{idVendor}==”0x046d”, ATTRS{idProduct}==”0x0821″, SYMLINK+=”webcam0″
~~~~~~~~~~~~~~~~~~~~~~~~~~~~~~~~
Note that I do not think that last “SYMLINK” bit is needed there, now that I think of it–because the symlink doesn’t appear to have been created. So I think you could probably just leave it out…or try it both ways. But this should work for folks using Debian, as long as you make sure to use the correct values for the vendor and product numbers as I noted above.
Also, be sure to verify that your device is video0–or make the appropriate change.
That is really useful! Thanks for that, Derek.
I can’t remember whether or not Derek showed how to find the vendor/product numbers for a USB device, but if not…I’ll post it here. Basically, used the “lsusb” command with the device plugged in:
************************************
$ lsusb
Bus 001 Device 002: ID 046d:0821 Logitech, Inc. HD Webcam C910
************************************
The first of the two ID numbers (0x046d) is the vendor ID, and the second (0x0821) is the product ID. Note that they are in Hex. But the point here is that if your numbers are different, then by all means plug your specific values into the sample rule I posted above. The rule goes into the “/etc/udev/rules.d/” directory, and it will have to be written into a file there. Just create a file named something like “99-video.rules.” The name isn’t critical, but make sure that the number (99 here) isn’t already being used (if it is then pick a different one), and also that you give it the “.rules” extension. Those two things are critical. You can reload the rules without rebooting after you save the file, but that is more of a hassle than it’s worth sometimes–so to be honest, the easiest thing to do is probably just to reboot the machine.
That is a great help. Derek.
No problem. Hope it works for folks, as it really is more convenient when running those v4l2-ctl commands, or grabbing images/footage.
Loc 12938: In the example where you configure the camera to use a certain set of pixel dimensions, I am having a problem. Basically, even though the v4l2-ctl help reports that it recognizes the -d and –device= parameters, it doesn’t actually seem to. For instance when I try, I get this…
****************************************
$ v4l2-ctl –set-format-video=width=640,height=480,pixelformat=1 -d 0
v4l2-ctl: unrecognized option ‘–set-format-video=width=640,height=480,pixelformat=1′
Unknown argument `-d’
Usage:
Common options:
–all display all information available
…
…
-d, –device= use device instead of /dev/video0
if is a single digit, then /dev/video is used
****************************************
So you can see that it is supposed to recognize the device parameter(s), however it simply doesn’t. Therefore I cannot get a pixel dimension configured, and consequently I cannot actually use the capture program a lit later in the chapter. Because I have the C910 (not the C920) camera, I cannot use the h.264 codec–because my camera doesn’t seem to support it. So I need to go recompile the capture.c file to length the select() timeout, which is easy enough. Basically though, this line sets ‘r’ to 0…
~~~~~~~~~~~~~~~~~~~~~~~~~~~
r = select(fd + 1, &fds, NULL, NULL, &tv);
~~~~~~~~~~~~~~~~~~~~~~~~~~~
…so I keep getting a select() error. I reviewed the man page for select and I think it’s just because select() is timing out (and thus returning 0). And I *think* it’s timing out because my camera is not set to the default 640×480 pixel format…which brings me back to that v4l2-ctl command. Whew! Anyway, I am unsure where to go from here, but can’t see how you got that line to work (the “v4l2-ctl –set-fmt…” line), given the error I showed above. Any ideas?
Very odd… Did you get to the OpenCV example? For example listing 12-3. It will be interesting to see if OpenCV can adjust the resolution of your camera. If it can, then it might be a much easier vehicle for capturing images that the low-level capture program. It really depends on your application! Derek.
No…that one didn’t work either, now that I think of it.
I just got my two BBB units back today, and got one of them mounted into an Adafruit BBB box with the camera plugged in. I am still getting it configured (it’s a new OS), so it will take me tonight and tomorrow morning to do that. Then I’ll basically start over in this chapter and skim through those exercises again using the BBB and the camera. Then I’ll post again.
Meanwhile, I need to install a Qt cross-compiler toolchain here in Ubuntu 12.04LTS. That’s turning into some fun, as the one from your video (#8 in your BB series) was for Angstrom. I do have Qt5 compiled and working, so I might want to simply use that…I’m not sure yet. So much to do, so little time.
Well, I got it working…I think. I’m not sure what I did to GET it working, but it’s working on the BBB. I was trying all this stuff yesterday on the BBW, and it wasn’t working. Today I got the BBB units back again, and now it seems as though the video is capturing somewhat correctly–as least for the first capture example. So far so good–and I’ll keep going tomorrow. Weird thing though–I did not have to apply that udev rule on the BBB. It just works as user, and I really do not understand that because the /dev/video0 device is still owned by root, and group ownership is the “video” group. I have always been in that group, on both the BBW and now the BBB…not I don’t really understand why it’s working now.
Heh…computers.
First and foremost thanks for the book.Great job Derek!!!!
When build the face detection program got this error
root@beaglebone:~/exploringBB/chp12/openCV# ./face
Starting face detection application
Capturing from the webcam
VIDIOC_QUERYMENU: Invalid argument
VIDIOC_QUERYMENU: Invalid argument
Successfully captured a frame.
Face at: (506,292)
(process:1541): Gtk-WARNING **: Locale not supported by C library.
Using the fallback ‘C’ locale.
(EBB OpenCV face detection:1541): Gtk-WARNING **: cannot open display:
can you please help me out Derek.
Thanks Dinesh, it appears to be working perfectly as it is detecting a face (ignore the invalid argument messages) — however, this example requires a VNC connection to display the result. Please read the section on VNC in the previous chapter and set up a display. Derek.
Hi Derek thanks face detection is now working.Now I am trying detect pedestrian using HOG what changes should I do.How to generate .xml file for this and how you generated xml file for face detection Can you please help me out its important for my M.Tech project.Thanks
Hi Dinesh, I’m afraid you are straying well beyond the content in the chapter there. You should review the materials that are linked at the end of the chapter — in particular, the CVOnline materials and the Cascaded Classification documents. Kind regards, Derek.
I am working on the offline text-to-speech examples (page 500) and have run into an issue with the libttspico-utils. When I attempt to do the apt-get, I’m getting the error message “Package libttspico-utils is not available, but is referred to by another package. This may mean the package is missing, has been obsoleted, or is only available from another source. E: Package… has no installation candidate”
I suspect this is a difference between my sources.list, but I’m not sure what I should be pointing at.
Hi Walt, Unfortunately it looks like the armhf package for libttspico-utils is currently missing from the Debian repositories. There was a major server crash and perhaps this is a casualty. That means that you have to do the installation manually. I just did it there and it works fine. The first step is to find a suitable alternative. Use the https://packages.debian.org website and search for libttspico-utils. You will find that there is only a version for Debian Jessie — that’s not great news, but it is worth a try. You will see the dependencies between each of the packages, which means that I had to perform the following steps:
Fortunately, it works perfectly. Hope that helps, Derek.
Thanks. I think I’m going to write that up as a script… I don’t trust my students to type that much without a mistake or two.
🙂 I know the feeling!
Worked like a charm. By the way thanks for the nice book.
Derek: Got another Chapter 12 issue. I’m running the latest Bone image and trying to replicate building of boneCV.cpp (12-3) on my bone. When I get to the “g++ -O2 `pkg-config –cflags –libs …” command, I am receiving an error :package opencv was not found in the pkg-config search path. After getting this the first time, I tried doing apt-get install libcv-dev. Alas, nothing changed. I know it has something to do with pkgconfig not setting itself up properly, but I’ve not found a definitive solution that actually works for this one.
Hi Walt, Are you re-keying the g++ command from the book or using the build script (https://github.com/derekmolloy/exploringBB/blob/master/chp12/openCV/build)? The reason I ask is because the grave character ` that wraps pkg-config always seems to cause problems. I just tried the build script under a clean image of Linux beaglebone 3.8.13-bone70 and it appears to work correctly:
molloyd@beaglebone:~/exploringBB/chp12/openCV$ ./build

Video for Beaglebone Video Applications - derekmolloy.ie

Building the OpenCV example for the Beaglebone

Building the OpenCV timing example for the Beaglebone

Building the face detection example for the Beaglebone

Finished
You can execute pkgconfig directly to check your system state, for example this is what I get under the latest image:
molloyd@beaglebone:~/exploringBB/chp12/openCV$ pkg-config --cflags --libs opencv

-I/usr/include/opencv  -lopencv_core -lopencv_imgproc -lopencv_highgui -lopencv_ml -lopencv_video -lopencv_features2d -lopencv_calib3d -lopencv_objdetect -lopencv_contrib -lopencv_legacy -lopencv_flann
Hope that helps, Derek.
Derek: Got another possible issue for you that maybe you ahve seen. I’m working through Chapter 12 and the openCV examples. I’m trying to compile the code of Figure 12-3, and when I do this, I get the error as follows:
Package opencv was not found in the pkg-config search path.
Perhaps you should add the directory containing opencv.pc. to the PKG… environment variable.
.
.
.
In file included from boneCV.cpp:8:0
/usr/include/opencv2/opencv.hpp:58:39: fatal error: opencv2/contrib/contrib.hpp: no such file or directory.
I can look at the opencv.hpp file and can clearly see it including the controb.hpp file, but it doesn’t seem like contrib.hpp is anywhere to be found on the bone. I’m guessing I missed something in the install, but I’m nto sure what?
Any ideas?
Walt
Hi Walt, Very strange! I checked my BeagleBone image and it is working from the pkgconfig default directories. Maybe check your image against the following steps:
molloyd@beaglebone:~/exploringBB/chp12/openCV$ cd /

molloyd@beaglebone:/$ sudo find . -name "opencv.pc"

./usr/lib/pkgconfig/opencv.pc

molloyd@beaglebone:/$ echo $PKG_CONFIG_PATH
molloyd@beaglebone:/$ PKG_CONFIG_PATH=/usr/lib/pkgconfig/
molloyd@beaglebone:/$ export PKG_CONFIG_PATH
molloyd@beaglebone:/$ echo $PKG_CONFIG_PATH
/usr/lib/pkgconfig/
molloyd@beaglebone:/$ pkg-config --cflags --libs opencv
-I/usr/include/opencv -lopencv_core -lopencv_imgproc -lopencv_highgui -lopencv_ml -lopencv_video -lopencv_features2d -lopencv_calib3d -lopencv_objdetect -lopencv_contrib -lopencv_legacy -lopencv_flann
Kind regards, Derek.
Derek: I left my bone on my desk at my office, so I’ll check first thing tomorrow morning. I was hand typing things, though I’ve never had an issue with the ` on plain old linux builds before.I may also try reburning the image in case something got corrupted along the way.
Hi Derek, First I want to say that your book is great and I have learned a lot about the Beaglebone and programming in general with Linux. Up till now I have primarily have been a Windows programmer, but getting more into robotics and embedded systems and this book speed me along.
The problem I am looking at is how to stream a video to the Beaglebone’s internal IP port so any computers can log into the Beaglebone’s IP address and access the video. I have tried this command to stream live video from a webcam:
./mjpg_streamer –i “input_uvc.so –fps 30 –r 1280×720” –o “output_http.so -p 8090 –w ./www”
I can then point a web browser or VLC video to the IP address of the BB and get the video. Is there a similar way to do that with either FFMPEG, or v4l2?
The second part is why I am trying something different. I am trying to capture the resulting video stream with OpenCV. The method using with mjpg_streamer, I can’t get openCV to connect and capture the stream. I have tried various commands such as
capture = cv2.VideoCapture()
capture.open(“http://16.86.238.211:8090/?action=stream.mjpg”)
but they can’t connect and capture the stream. So, I am wondering if you have commands that streams video to the BB’s internal port, and then OpenCV commands that can access that from an external computer? BTW, I have tried openCV 2.4.9 through the new 3.0 and they all have the same issue.
Thanks,
Eric
Thanks Eric. Do I understand correctly that you have mjpg_streamer streaming a video stream from a MJPG camera and HD resolution? That is interesting as I have not seen it working — are you getting a reasonable frame rate?
By the internal IP address, so you mean 192.168.7.2? If so, you should really connect the BeagleBone to your network via Ethernet and it will be assigned an IP address, which you can share within your network, or externally to the Internet if you set the IP address to be static (pg. 423) and set up port-forwarding on your Internet router.
On the second question — I have never tried to capture a mjpg stream, but make sure that your version of OpenCV has FFMPEG support, as I don’t think it is always present. By the IP address that you are using, I am not sure that I properly understand the first question now. Do you mean multiple clients simultaneously viewing the stream? Apologies, Derek.
Thanks for the reply Derek… sorry I wasn’t clear. I haven’t been able to get the mjpg_streaming to work with OpenCV so I have given up on that for now. I am trying to get the UDP working. I can run your streamVideoUDP from the boneCV repo and see it with the VLC media player on my networked computer. BTW, I am testing this at work with Ethernet connections and a Logitech C920 camera.
The problem I am still having is getting OpenCV to connect to the streaming video. I can connect to a local webcam with the normal VideoCapture(0) command. I have tried various commands under OpenCV such as VideoCapture(‘udp://@:1234’) or VideoCapture(‘udp://@:1234.mjpg’), but haven’t had anything work. Have you got OpenCV to work opening a streaming video from the Beaglebone over Ethernet?
Thanks again, Eric
BTW, I am trying to run this under the Python interface, but could program this in C and then wrap it. Thanks.
Hi Eric, I understand perfectly now, but unfortunately it is not something I have ever tried. I did a quick search of the OpenCV forums and it seems to be an open issue (see: http://code.opencv.org/issues/2235). I think that is going to be a difficult problem to solve. Kind regards, Derek.
Thanks Derek. Yes, I have been working on it off and on for a couple of weeks. I was hoping maybe you tried it and knew of a way to do it. I think I will try capturing the images with OpenCV on the BBB and then sending the images over TCP to a client computer. Thanks again and Best Regards, Eric
Hi Derek. What a great book!!! I managed to connect an old Genius webcam and a Sony Playstation 2 Eye-Toy camera to the BeagleBone Black following this chapter.
I was wondering if you have came across a way to add/overlay text on the video from C/C++, i.e. add the time, local temperature etc?
Thank you.
Thanks Peter! If you use the OpenCV C++ library you can use the putText() drawing function to add text. Kind regards, Derek.
Hello Derek, im currently using fswebcam to generate pictures in a loop but I dont know how to save them with different names could you suggest any way?, also is there any way to georeference the file using gps input?
Hi Derek, is there a way to take pictures with fswebcam in a loop and storing them with different names?
Hi David, you could write a Bash script that calls fswebcam to capture a single frame and passes the name. It then sleeps and loops. You could also use the script to pull in the GPS location from a UART GPS device. Hope that helps, Derek.
Hi Derek
I’m not sure I put this in a correct place or not.
I Run the Audiodevices example on my BBB but it seems the app couldn’t detect my USB sound card.
The program shows noting in all field.
I’m wondering am I have to do something to export my USB sound card to my QT app like the
export QWS_MOUSE_PROTO=LinuxInput:/dev/input/event1 for adding Touch screen to my QT APP,
Or it should be detect it automatically?
This is the result of aplay -l
card 0: default [C-Media USB Headphone Set], device 0: USB Audio [USB Audio]
Subdevices: 1/1
Subdevice #0: subdevice #0
Any help will appreciated
Thank You
Iman
new question. Got past last issue and now can ping via PC connection.
On page 477, you have
~# sudo apt-get update
when I run this I get two errors:
could not get lock /var/lib/dpkg/lock
unable to lock the administration directory
Any clue about how to fix this? Searching the net yields different opinions.
Thanks
Regarding the last post…
I tried rm /var/lib/dpkg/lock and that seemed to fix the error messages. So I was apparently able to complete the update command.
When I attempt to install the packages (your next step on p. 477), I get two errors:
unable to locate package libv41-dev
unable to locate package v41-utils
Any clue why these are missing??
Hi John, missed your messages. I guess that you may have worked it out by now, but it is v4l (letter l), not v41. Kind regards, Derek.